This is the first of three blogs performing
a basic out of the box installation of the newly released Oracle BI
Applications 11.1.1.8.1.
I’m performing a completely fresh installation on our Exalytics/Exadata servers using an E-Business Suite 12.1.3 database as the data source.
In part 1 below I’ll be going through the pre-requisites required before BI Apps can be installed, including installing OBIEE, ODI and creating the warehouse and repositories using the RCU.
Part 2 (http://paulcannon-bi.blogspot.co.uk/2014/06/installing-bi-apps-111181-part-2.html) will cover installing and configuring BI Apps
Part 3 (http://paulcannon-bi.blogspot.co.uk/2014/06/installing-bi-apps-111181-part-3.html) will demonstrate a simple example of load data into the warehouse and viewing it in OBIEE.
For the pre-requisites for BI Apps we’ll be
performing the following steps:
- Review System Requirements
- Determine the Environment
- Download BI Apps Install files from Oracle
- Configure Oracle DB for warehouse & repositories
- Install a JDK
- Install Oracle Business Intelligence Enterprise Edition
- Upgrade Weblogic server to 10.3.6
- Install Oracle Data Integrator
- Create schemas for Oracle BI Applications
Review System Requirements
Before beginning review the system
requirements for BI Apps. This can be found at
and downloading the file for the release of BI Apps being installed, in this case 11.1.1.8.1:
System Requirements and Supported Platforms for Oracle Business Intelligence Applications Release 11.1.1.8.1 ( xls )
This is a spreadsheet with six tabs covering required versions for the OS, additional software etc.
The support source applications tab is required later on during the install as this lists the projects included within BI Apps.

select comp_id, version, status, comp_name
from dba_registry where comp_id='SDO';
If spatial is installed you will get one
record returned:
COMP_ID VERSION STATUS COMP_NAME
-------------
------------- --------------- ---------------
SDO 11.2.0.3.0 VALID Spatial
If spatial isn’t installed then install it
before continuing.
Determine the Environment
My Environment has four servers:
- 1E-Business Suite 12.1.3 database server (with VISION demo data)
- 2Database server (for the DW warehouse) with Oracle 12c pre-installed. This is our Exadata server
- 3Repository Database Server. A small 12c database just used for repositories and sample data
- 4BI Apps Server. This is our Exalytics server.
All four are linux x86-64 and I have all
the userids/passwords/access I need on all of them.
Download BI Apps Install files from Oracle
The following set of files needs to be
downloaded before starting. Most come from the BI Apps media pack on edelivery,
but there are a couple patch files which are downloaded from the oracle support
website.
edelivery.oracle.com
Product Pack: Oracle
Business Intelligence
Platform Linux x86-64
Media Pack: Oracle Business
Intelligence Applications 11.1.1.8.1 Media Pack for Linux x86-64
Files:
Oracle Business
Intelligence 11g (11.1.1.7.0) for Linux x86 (64-bit) (Disc 1 of 3) (Part 1 of
2)
Oracle Business
Intelligence 11g (11.1.1.7.0) for Linux x86 (64-bit) (Disc 1 of 3) (Part 2 of
2)
Oracle Business
Intelligence 11g (11.1.1.7.0) for Linux x86 (64-bit) (Disc 2 of 3) (Part 1 of
2)
Oracle Business
Intelligence 11g (11.1.1.7.0) for Linux x86 (64-bit) (Disc 2 of 3) (Part 2 of
2)
Oracle Business
Intelligence 11g (11.1.1.7.0) for Linux x86 (64-bit) (Disc 3 of 3)
Oracle Business
Intelligence Developer Client Tool (11.1.1.7.0) for Microsoft Windows (64bit)
Oracle Business
Intelligence Applications (11.1.1.8.1).zip
Oracle Business
Intelligence Applications RCU (11.1.1.8.1) for Linux x86-64.zip
Oracle Data Integrator 11g
(11.1.1.7.0) (Part 1 of 2).zip
Oracle Data Integrator 11g
(11.1.1.7.0) (Part 2 of 2).zip
Oracle Fusion Middleware
Platform Patches for Oracle Business Intelligence Applications (11.1.1.8.1)
(Part 1 of 2).zip
Oracle Fusion Middleware
Platform Patches for Oracle Business Intelligence Applications (11.1.1.8.1)
(Part 2 of 2).zip
Oracle Fusion Middleware
Platform Patches for Oracle Business Intelligence Applications for Linux
x86-64.zip
Oracle Fusion Middleware
Repository Creation Utility 11g (11.1.1.7.0) for Linux x86-64.zip
The other files in this media pack I didn’t
download as I didn’t need them – Windows versions of some of the files,
Weblogic server or the Endeca samples.
Product Pack: Oracle
Database
Platform Linux x86-64
Media Pack: Oracle Database
12c Release 1 (12.1.0.1.0) Media Pack for Linux x86-64
Files:
Oracle Database 12c Release 1 Client (12.1.0.1.0) for Linux x86-64
My
Oracle Support
I downloaded the following patch files just
by searching for the patch number and platform:
p13529623_1036_Generic.zip (This is the patch for Weblogic 10.3.6)
p16569379_111170_Linux-x86-64.zip (dynamic monitoring patch for OBIEE)
Install Oracle Client on the BI Apps server
At various points during the installation we’ll need to connect to the data warehouse on the database server, so although not compulsory, it’s easier if we have a basic Oracle client installed on the BI Apps server before we begin.
Unzip the “Oracle Database 12c Release 1 Client (12.1.0.1.0) for
Linux x86-64” zip file and run the runInstaller command from the client
directory. I chose a custom install with just SQL*Plus, Oracle Database
Utilities and the Oracle Call Interface and placed it in a home directory by
itself.
Configure Oracle DB for warehouse & repositories
Once
BI Apps is fully installed there will be a lot of traffic between the data
warehouse and BI Apps servers as the users run reports. To maximize the
throughput of data the SDU and TDU parameters should be increased from the
default 2KB setting.
In
the listener.ora on the database server I added (SDU=16384)(TDU=16384):
(SID_DESC=
(SDU=16384)(TDU=16384)
(GLOBAL_DBNAME=dbserver.local.com)
(ORACLE_HOME=C:\app\product\12.1.0\ora12c)
(SID_NAME=ora12c))
|
Then
added the same parameters to the tnsnames.ora on the BI Apps server:
dbserver =
(DESCRIPTION = (SDU=16384)(TDU=16384)
(ADDRESS = (PROTOCOL = TCP)(HOST = dbserver.local.com)(PORT
= 1521))
(CONNECT_DATA =
(SERVER = DEDICATED)
(SERVICE_NAME = ora12c.local.com)
)
)
|
Check
the guidelines for Oracle Database in the BI Apps install doc (sections 2.1
& 2.2) for more details on this and other aspects to consider.
Install a JDK
BI
apps required a JDK and the install guide tells you to download and install JDK
1.6.0_35 or better. However it’s not strictly needed as OBIEE installs its own
JDK and this is 1.6.0_35, so we can use that for all the BI Apps components.
Install Oracle Business Intelligence Enterprise Edition
The
main starting point for a BI Apps installation is OBIEE 11g. BI Apps now
integrates itself with an existing OBIEE installation and is controlled by the
same Enterprise Manager instance.
There
are a number of ways of installing OBIEE and what BI Apps requires is a minimum
of version 11.1.1.7.131017 running under Weblogic server 10.3.6.
An
out of the box installation of OBIEE gives you version 11.1.1.7.0. You do not
have to upgrade to 11.1.1.7.131017 as the patch section of the BI Apps install
later on will do this for you..
OBIEE
also comes with version 10.3.5 of Weblogic Server, so this need to be upgraded
to 10.3.6 and we’ll do this in the next step.
Before
beginning the OBIEE installation we need to create the repositories. Unzip the
following file to a temporary directory (do not confuse this file with the BI
Apps RCU zip file)
Oracle Fusion Middleware
Repository Creation Utility 11g (11.1.1.7.0) for Linux x86-64.zip
From
this directory change to the \rcu\bin directory and run :
./rcu
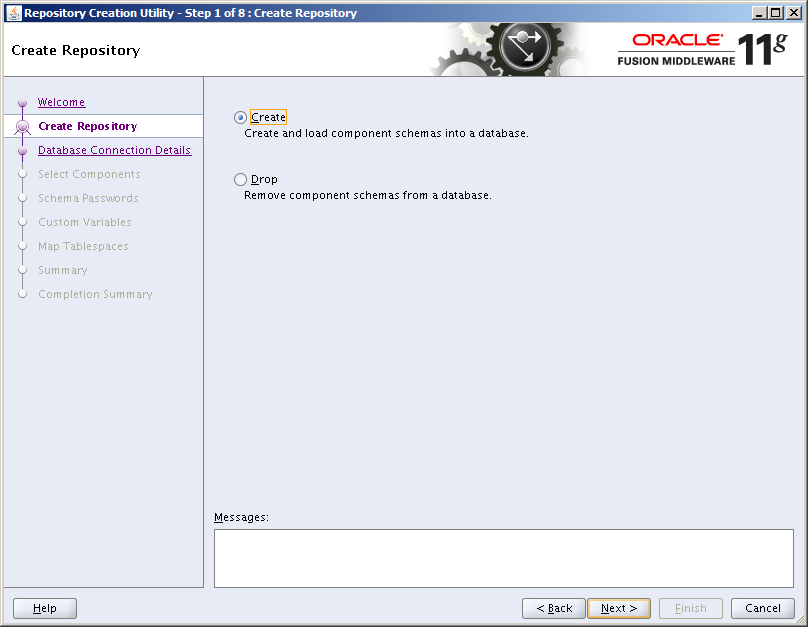
Click
past the welcome screen:

Choose ‘Create’
Choose ‘Create’

Enter
the connection details for the database which will house the repositories:

After
performing pre-requisite checks enter a prefix (I used BIAPPS) and select
‘Oracle Business Intelligence’ -> ‘Business Intelligence Platform’:

Enter
a password for the two schemas:

The
tablespaces are small, so the default settings can be left in place:

The
tablespaces will then be created. You’ll then get the summary screen confirming
the repository components which are about to be installed:

The
repositories will then be created:

Close
the RCU.
Now
OBIEE can be installed. To start the OBIEE installation unzip all five of the
OBIEE zip files to a temporary directory:
Oracle Business
Intelligence 11g (11.1.1.7.0) for Linux x86 (64-bit) (Disc 1 of 3) (Part 1 of
2)
Oracle Business
Intelligence 11g (11.1.1.7.0) for Linux x86 (64-bit) (Disc 1 of 3) (Part 2 of
2)
Oracle Business
Intelligence 11g (11.1.1.7.0) for Linux x86 (64-bit) (Disc 2 of 3) (Part 1 of
2)
Oracle Business
Intelligence 11g (11.1.1.7.0) for Linux x86 (64-bit) (Disc 2 of 3) (Part 2 of
2)
Oracle Business
Intelligence 11g (11.1.1.7.0) for Linux x86 (64-bit) (Disc 3 of 3)
Then from the
bishipship/Disk1 subdirectory run:
./runInstaller
Skip past the welcome
screen:

Select
‘Skip software updates’. OBIEE will be patched up to the correct version later
on in the BI Apps installation.

You must not perform a Simple installation of OBIEE – this will not work with
BI Applications. You must perform an Enterprise installation or a software-only
followed by a domain configuration. I’ve
chosen the Enterprise installation so that OBIEE is configured straight away.

Let
the prerequisite checks run. If you get any issues then deal with these before
continuing.

Enter
a user-name and password for the BI system admin account. Do not scale out the
BI System:

Specify
a directory for the Middleware home. The other fields will auto-fill with
default values beneath this which I’ve left as is:

The
BI Apps install guide specifically states that the OBIEE install must include
Real-Time decisions and Essbase Suite. Not 100% sure this entirely necessary –
I suspect it depends on whether your installing modules which use these – not
all do. I have included them anyway:

You
now need to tell the installer where the BIPLATFORM repository is located –
enter the details (including the prefix on the schema name) created with the
RCU above:

This
is then followed by the details of the MDS repository schema – this will
probably default to the correct settings:

I’ve
chosen to leave the ports at the default values (7001 for Weblogic, 9704 for
OBIEE) using the Auto-Port configuration:

I do not want Oracle emailing me about updates (I get enough of those already…):

Check
the installation summary that all is correct. I usually use the ‘save’ button
to keep a record of how I installed it:

Let
the installation progress…

Followed
by the configuration…

On
the completion screen take a note of the installation details, especially the
URLs – use the save button to save these to a text file. Then close the
installer.

Quickly
check that OBIEE has installed correctly - a browser will launch on closing the
installer – login with the admin user-id
(weblogic) created above:

Weblogic
and OBIEE will need to be stopped and restarted a number of times during the BI
Apps installation, so now is a good time to setup a script to do this. Below is
the standard script I use.
Create
a file called biapps.sh in a suitable directory (e.g. your user home
directory), edit it and paste in the contents below, altering the top lines
with the details of your installation, then make the file runnable (chmod 777
biapps.sh). The script uses a /log directory to keep its logs in.
To
stop Weblogic (and OBIEE) run:
./biapps.sh stop
To
start Weblogic (and OBIEE) run:
./biapps.sh start
# Start and stop Oracle
Business Intelligence 11g components.
ORACLE_OWNR=oracle # Local
Unix user running OBIEE
ORACLE_FMW=/u01/app/biapps # Deployment
Middleware directory
BIEE_DOMAIN=bifoundation_domain # Domain name
BIEE_INSTANCE=instance1 # Instance
name
BIEE_SERVER=bi_server1 # Server
name
BIEE_MANAGER_URL=biapps_server:7001 # Admin server URL
BIEE_USER=weblogic # Admin
user
BIEE_PASSWD=welcome1 # Admin password
LOG_PATH=/home/oracle/logs # Log directory
WL_PATH=$ORACLE_FMW/wlserver_10.3/server/bin
BIEE_PATH=$ORACLE_FMW/user_projects/domains/$BIEE_DOMAIN/bin
ORACLE_INSTANCE=$ORACLE_FMW/instances/$BIEE_INSTANCE
export ORACLE_INSTANCE
ORACLE_HOME=$ORACLE_FMW/Oracle_BI1
export ORACLE_HOME
INSTANCE_HOME=$ORACLE_FMW/instances/$BIEE_INSTANCE
export INSTANCE_HOME
WLS_HOME=$ORACLE_FMW/wlserver_10.3
export WLS_HOME
FMW_HOME=$ORACLE_FMW
export FMW_HOME
#create the security file
boot.properties
rm -f
$ORACLE_FMW/user_projects/domains/$BIEE_DOMAIN/servers/AdminServer/security/boot.properties
rm -f
$ORACLE_FMW/user_projects/domains/$BIEE_DOMAIN/servers/$BIEE_SERVER/security/boot.properties
echo username=$BIEE_USER
>$ORACLE_FMW/user_projects/domains/$BIEE_DOMAIN/servers/AdminServer/security/boot.properties
echo password=$BIEE_PASSWD
>>$ORACLE_FMW/user_projects/domains/$BIEE_DOMAIN/servers/AdminServer/security/boot.properties
echo username=$BIEE_USER
>$ORACLE_FMW/user_projects/domains/$BIEE_DOMAIN/servers/$BIEE_SERVER/security/boot.properties
echo password=$BIEE_PASSWD
>>$ORACLE_FMW/user_projects/domains/$BIEE_DOMAIN/servers/$BIEE_SERVER/security/boot.properties
NOW=$(date +"%Y%m%d-%H%M")
START_LOG=$LOG_PATH/obiee_start_$NOW.log
STOP_LOG=$LOG_PATH/obiee_stop_$NOW.log
SUBSYS=obiee
start() {
echo
"********************************************************************************"
echo "Starting Admin Server on
$(date)"
echo
"********************************************************************************"
$BIEE_PATH/startWebLogic.sh &
wait_for "Server started in RUNNING
mode"
echo
"********************************************************************************"
echo "Starting Node Manager on
$(date)"
echo
"********************************************************************************"
$WL_PATH/startNodeManager.sh &
wait_for "socket listener started
on port"
echo
"********************************************************************************"
echo "Starting Managed Server
$BIEE_SERVER on $(date)"
echo
"********************************************************************************"
$BIEE_PATH/startManagedWebLogic.sh
$BIEE_SERVER http://$BIEE_MANAGER_URL &
wait_for "Server started in RUNNING
mode"
echo
"********************************************************************************"
echo "Starting BI components on
$(date)"
echo
"********************************************************************************"
$ORACLE_HOME/opmn/bin/opmnctl startall
$ORACLE_HOME/opmn/bin/opmnctl status
echo "********************************************************************************"
echo "OBIEE start sequence
completed on $(date)"
echo
"********************************************************************************"
}
stop() {
echo "********************************************************************************"
echo "Stopping BI components on
$(date)"
echo
"********************************************************************************"
$ORACLE_HOME/opmn/bin/opmnctl stopall
echo
"********************************************************************************"
echo "Stopping Managed Server
$BIEE_SERVER on $(date)"
echo
"********************************************************************************"
$BIEE_PATH/stopManagedWebLogic.sh $BIEE_SERVER t3://$BIEE_MANAGER_URL
$BIEE_USER $BIEE_PASSWD
echo
"********************************************************************************"
echo "Stopping Node Manager on
$(date)"
echo "********************************************************************************"
pkill -TERM -u $ORACLE_OWNR -f
"$ORACLE_FMW/wlserver_10.3/server/lib/weblogic.policy
-Dweblogic.nodemanager"
echo
"********************************************************************************"
echo "Stopping Admin Server on
$(date)"
echo
"********************************************************************************"
$BIEE_PATH/stopWebLogic.sh
echo
"********************************************************************************"
echo "Cleaning up .lok files"
echo
"********************************************************************************"
rm -f
$ORACLE_FMW/user_projects/domains/$BIEE_DOMAIN/edit.lok
rm -f $ORACLE_FMW/user_projects/domains/$BIEE_DOMAIN/config/config.lok
rm -f
$ORACLE_FMW/user_projects/domains/$BIEE_DOMAIN/servers/bi_server1/data/ldap/ldapfiles/EmbeddedLDAP.lok
rm -f
$ORACLE_FMW/user_projects/domains/$BIEE_DOMAIN/servers/bi_server1/tmp/bi_server1.lok
rm -f
$ORACLE_FMW/user_projects/domains/$BIEE_DOMAIN/servers/AdminServer/data/ldap/ldapfiles/EmbeddedLDAP.lok
rm -f
$ORACLE_FMW/user_projects/domains/$BIEE_DOMAIN/servers/AdminServer/tmp/AdminServer.lok
echo
"********************************************************************************"
echo "OBIEE stop sequence completed
on $(date)"
echo
"********************************************************************************"
}
wait_for() {
res=0
while [[ ! $res -gt 0 ]]
do
res=$(tail -5 "$START_LOG"
| fgrep -c "$1")
sleep 5
done
}
case "$1" in
start)
echo
"********************************************************************************"
echo "Starting Oracle Business
Intelligence on $(date)"
echo "To view log file: tail -f
$START_LOG"
echo
"********************************************************************************"
start &> $START_LOG &
touch $LOG_PATH/$SUBSYS
;;
stop)
echo
"********************************************************************************"
echo "Stopping Oracle Business
Intelligence on $(date)"
echo "Logs are sent to
$STOP_LOG"
echo
"********************************************************************************"
stop &> $STOP_LOG
rm -f $LOG_PATH/$SUBSYS
;;
status)
echo "********************************************************************************"
echo "Oracle BIEE components
status...."
echo
"********************************************************************************"
$ORACLE_HOME/opmn/bin/opmnctl status
;;
stopopmn)
echo
"********************************************************************************"
echo "Oracle BIEE components
status...."
echo
"********************************************************************************"
$ORACLE_HOME/opmn/bin/opmnctl
stopall
;;
startopmn)
echo
"********************************************************************************"
echo "Oracle BIEE components
status...."
echo "********************************************************************************"
$ORACLE_HOME/opmn/bin/opmnctl
startall
$ORACLE_HOME/opmn/bin/opmnctl status
;;
restartopmn)
echo
"********************************************************************************"
echo "Oracle BIEE components
status...."
echo
"********************************************************************************"
$ORACLE_HOME/opmn/bin/opmnctl
stopall
$ORACLE_HOME/opmn/bin/opmnctl
startall
$ORACLE_HOME/opmn/bin/opmnctl status
;;
restart)
$0 stop
$0 start
;;
*)
echo "Usage: $(basename $0)
start|stop|restart|stopopmn|startopmn|restartopmn|status"
exit 1
esac
exit 0
|
Upgrade Weblogic server to 10.3.6
BI
Apps required Weblogic server version 10.3.6.
If OBIEE was installed using the enterprise option as above then version of Weblogic server will be 10.3.5, so it needs to be upgraded. If you performed a “software only” install into an existing Weblogic server installation you need to check the version of Weblogic: open the console, click on Servers, click on AdminServer then look in the Monitoring tab and the Weblogic Version line.
The version in this screen shot needs upgrading to 10.3.6.

To upgrade weblogic download the upgrade patch file from oracle support:
Patch number 13529623, file
= p13529623_1036_Generic.zip
Before upgrading weblogic,
shutdown OBIEE and the weblogic processes. Make sure to include stopping the
node manager (the script above does this)
The upgrade patch is a
single jar file, called with the java command (using the JDK installed in the
OBIEE home):
/<OBIEE_HOME>/Oracle_BI1/jdk/bin/java
-jar wls1036_upgrade_generic.jar
This launches the install
wizard:

Select the existing
Middleware home where OBIEE is installed:

The Register for Security
updates screen is a little flakey…you can’t uncheck the ‘I wish to receive…’
check box

So if you don’t want these
emails you need to ignore the dire warning messages that appear upon clicking
Next then on the next screen check the ‘I wish to remain uninformed’ check box
and click continue and confirm in the warning box that appears.


Confirm the Installation is
correct:

Wait whilst the upgrade
takes place:

Then you should get the
installation complete screen. Uncheck the ‘Run Quickstart’ option before
closing – this just starts a new app for controlling Weblogic which we don’t
need.

Now restart Weblogic &
OBIEE using your start script.
A quick check in the console
proved the upgrade had indeed succeeded:

Install Oracle Data Integrator
The
next step is to install Oracle Data Integrator. This needs to be embedded in
the same Weblogic server as OBIEE AND in the same Middleware home are OBIEE so
that BI Apps can access it directly. You must not install ODI anywhere else or
BI Apps will not be able to use it.
You
must also use the version of ODI from the same download media pack from
edelivery – 11.1.1.7.0. You cannot use earlier or later versions. The version
does get patched up during the patching process later on, but not up to ODI
12c.
From
the BI Apps media pack unzip the following two files into a temporary directory:
Oracle
Data Integrator 11g (11.1.1.7.0) (Part 1 of 2).zip
Oracle
Data Integrator 11g (11.1.1.7.0) (Part 2 of 2).zip
Then
from the Disk1 directory run:
./runInstaller
-jreLoc <OBIEE_HOME>/Oracle_BI1/jdk
e.g.
./runInstaller –jreLoc /u01/app/biapps/Oracle_BI1/jdk
(if
you leave off the –jreLoc parameter it will prompt you to enter it upon
running)
On the welcome screen ignore the message about creating an ODI repository. This will be performed later when installing BI Apps.

We
do not want software updates for this installation.

Select ODI SDK along with ODI Studio and all of the Java EE Installation options.

Confirm
the prerequisite checks pass ok:

You must choose the Middleware home where OBIEE is installed.

This
screen is a little pointless, you can only choose Weblogic Server:

Choose
‘Skip Repository Configuration’. The repository will be configured when BI Apps
is installed later on.

Confirm the installation details:

Wait
for the install to run through:

The
Configuration is automatic and quick:

And
finally the installation is complete:

At
this point we don’t want to do anything with ODI – the software is installed
and ready to be configured for BI Apps later on.
Create schemas for Oracle BI Applications
BI
Apps requires three database schemas to be created:
1.
The Data Warehouse schema
2.
The BI Applications Repository
3.
The BI Apps specific ODI Repository
These
are created using the BI Apps version of the RCU. From the media pack downloaded
earlier unzip the following file into a temporary folder:
Oracle
Business Intelligence Applications RCU (11.1.1.8.1) for Linux x86 (64bit).zip
In
order to build the data schemas the RCU needs to import some export .dmp files.
These are located under the directory rcu\integration\biapps\schema in the
temporary file you unzipped the above file into.
If
the databases are installed on a different server to where you are running the
RCU (which they are in my case) these .dmp files need to be copied (ftp’d) to the database server into a directory with
global write access (so that log files can be written to). Take a note of the
directory you copy them to; you will be aksed for this during the repository
creation.
This
is further complicated by the fact that I am installing the data warehouse on
one server, but the repositories on another. Where you install these is up to
you, I have chosen to keep them separate.
There
are three .dmp files:
obia_comp.dmp BI Apps repository
obia.dmp Data
warehouse
obia_odi.dmp ODI
Repository

So
in my case I need to FTP obia.dmp to my data warehouse server and obia_comp.dmp
& obia_odi.dmp to my repository server.
This
also means that I need to run the Repository Creation Utility twice – once each
for both servers.
From
the rcu/bin directory run ./rcu
Click
past the welcome screen:

Select
‘Create’ and continue.
Now
we need to enter the database connection details. In this first run of the RCU
I’m just going to setup the data warehouse schema, so I need to enter the
details of the data warehouse server:

Let it check the prerequisites of the database, then it will ask which components to install. Expand ‘Oracle Business Intelligence Applications’ and just select ‘Oracle Business Analytics Warehouse’.
After
entering a prefix, BIAPPS in this case, we can see the schema it will create:
BIAPPS_DW:

Now
enter the password for this schema:

You must now enter the name of the directory
where the .dmp file (obia.dmp in this case) was copied to on the database
server. You do not need to specify the file name:

Now
you need to manage the tablespaces for the data warehouse. There are some
changes that need to be made here.
Click
on “Manage Tablespaces”

We
need to make adjustments to the four new tablespaces about to be created:
o
BIAPPS_DW_DATA
o
BIAPPS_DW_IDX
o
BIAPPS_DW_STG
o
BIAPPS_DW_TMP
The
changes are about to make are for guidance only, depending on the size you
expect your warehouse to become you may enter different values. Don’t forget of
course that once the tablespaces have been created they can be amended directly
within the database by a DBA.
So
start by clicking on the DW_DATA tablespace (BIAPPS_DW_DATA in this case). When
its details appear click on the file name field (+DATA_DM01 in this case –
yours will be different depending on how the database has been configured) and
click on the edit (pencil) icon

In
the Edit Datafile window change the size to 20GB, ensure autoextend is selected
and set the maximum size to Unlimited. Then click ok.

Now click on the
DW_IDX tablespace and edit it’s datafile. Leave the size at 5GB, but ensure
autoextend is on and set the maximum size to unlimited:

Then
edit DW_STG. Change the size to 10 GB, ensure Autoextend is on and set the
maximum size to Unlimited.
Finally
edit DW_TEMP, Change the size to 15 GB, ensure Autoextend is on and set the
maximum size to Unlimited:
Click
ok to save the tablespace changes.
Back
in the Map Tablespaces screen click next to continue.
At
this point the tablespaces will be created.

You'll then get the summary screen
confirming that schema's will be created. click Create to start it off. This
make take a little while to run - the DW schema is quite large and the dmp file
will be imported into it.

And finally the completion screen should show
the creation was successful. Close the RCU.

Once
complete you’ll be able to directly access the data warehouse objects by
connecting with the BIAPPS_DW user-id:

Now the RCU needs to be run a second time to
create the BI Apps repository and ODI repository.
From the rcu/bin
directory run ./rcu again.
This time in the
database connection details screen I entered the details for my repository
database.
Now in the select
components screen we enter the same prefix but select the two repository
components: BIACOMP and BIA_ODIREPO:

After entering the
passwords, we now enter the directory where we copied the two .dmp files,
obia_comp.dmp & obia_odi.dmp) on the repository database server:

There
are no specific guidelines on the tablespaces for these two schemas so the
defaults can be left in place.

Carry on to let the RCU create the schemas:

So that’s it, all the pre-requisite tasks
have been performed and everything is ready for BI Apps to be installed.
That’ll be in part 2.
I have done all the installations but when I started ConfigApp.bat it fails at Deploying BI ApplicationsConfig Template
ReplyDeleteWaiting for your BIApps Blog.I am doing installation on windows 64 bit.
ReplyDeleteThis comment has been removed by a blog administrator.
ReplyDeleteI really appreciate information shared above. It’s of great help. If someone want to learn Online (Virtual) instructor lead live training in Oracle BI Applications for eBusiness OBIA
ReplyDelete, kindly contact us http://www.maxmunus.com/contact
MaxMunus Offer World Class Virtual Instructor led training on Oracle BI Applications for eBusiness OBIA. We have industry expert trainer. We provide Training Material and Software Support. MaxMunus has successfully conducted 100000+ trainings in India, USA, UK, Australlia, Switzerland, Qatar, Saudi Arabia, Bangladesh, Bahrain and UAE etc.
For Demo Contact us.
Nitesh Kumar
MaxMunus
E-mail: nitesh@maxmunus.com
Skype id: nitesh_maxmunus
Ph:(+91) 8553912023
http://www.maxmunus.com/