As this is on a laptop
it’s a windows installation. Installing on Linux is virtually identical, but
with .sh scripts in place of .cmd script and of course my automation of the
starting of the agent could easily be replicated in a linux shell script to.
Note: The installation
below will create two oracle homes, one for ODI itself and one for the Agent.
For notation I’ll refer to them as <ODI_HOME> and <AGENT_HOME>.
Pre-Requisites
In standalone mode
there is no weblogic server. ODI runs by itself, whilst the weblogic node
manager (included in the ODI install files) is used to manage the running of
the agent. So there is no need to download a weblogic install set.
Before installing ODI
you must have a database installed. If you will always be running ODI on a
network this can be on any connected server. If you plan to run ODI off-line on
a laptop then obviously you need the database installed locally as well. I’m
not covering how to do this in this blog – there are plenty of instructions on
the web on how to do this. The database can be Oracle, SQL Server, MySql or
DB2. In this instance I’m using Oracle 12c.
The database is
primarily required for the ODI repositories, but obviously can also be used to
populate data with using ODI! No special database features are required for ODI
but you can include whatever features you need for your ODI project.
ODI 12c itself is
installed from the same file set as when performing an standard enterprise
install, so download and unzip ofm_odi_generic_12.1.2.0.0_disk1_1of1.zip from
technet. This creates the install file odi_121200.jar
You need a JDK
installed before you start. My laptop already had JDK 7u55. Also check that the
JAVA_HOME environment variable is set (this is not done by the JDK installer).
It’s not compulsory but saves some typing later on.

Note: use the short
name for Program Files: “Progra~1”, the space between “Program” and “Files” will
cause problems when running some of the java components later on.
Install ODI 12c
Now we can start the
ODI installation. We will need to run the installer twice. The first will
install the basic ODI components which are required however you install ODI.
Then since we do not have an weblogic server for the Agent we need to run the
installer a second time to install the stand-alone agent components.
The installation
requires a temporary directory. In windows this can simply be c:\temp. Create a
temporary directory if you don’t have one.
Now open a command
window , change directory to where you unzipped odi_121200.jar above and enter
the following command, altering the java path and temp directory to suite your
environment:
"C:\Program
Files\Java\jdk1.7.0_55\bin\java" -Djava.io.tmpdir=c:\temp -jar
odi_121200.jar

After a few seconds
the installer will launch. Click next past the welcome screen:

The Oracle Home
defaulted to c:\oracle\Middleware\Oracle_Home. Since I already had an oracle
home under c:\app with the oracle database in it, I changed the home to there:

In the Installation
Type screen select ‘Enterprise installation’. This will install the main ODI
software required regardless of the installation type.

Confirm the
prerequisites pass ok:

Check the Installation
Summary (a little pointless in this case, we’ve hardly had to select much!):

Let the installation
proceed:

And finally confirm
the installation completed successfully. The installer will close when you
click Finish.

Now run the installer
a second time using the same command as above and click past the welcome screen
again.
This time we are going
to perform the standalone installation for the Agent. The Agent must be
installed in a different Oracle Home to the main enterprise installation above,
so enter a different path:

In the installation
type screen choose Standalone installation:

Then click past the
prerequisite checks screen. (I’ve never seen the pre-reqs for the standalone
fail when enterprise pre-reqs passed!).
As you are now
performing a stand-alone installation, as opposed to an installation into other
installed software (Weblogic server), the installer now asks if you want to be
kept informed about software security updates. The choice is yours, as this is
just a local dev installation I’d decided not received the emails:

Upon clicking next you
will then be taken through the installation summary & progress screens,
finally ending up at the completed screen:

Create the ODI Repositories
ODI requires two repositories – a Master repository,
containing global configuration details, such as security, and a Work
repository, containing the actual ETL projects you build.
The repositories are created with the Repository
Creation Utility (RCU) which is located within the <ODI _HOME>.
Go to the <ODI_HOME>\oracle_command\bin
directory and run rcu.bat:

This opens the RCU.
Click past the welcome screen:

You are now asked what
you wish to do. In this case we want to create a new repository and do it now.
So select ‘Create Repository’ and ‘System Load and Product Load’. If you are installing the repositories in a
server based database and require a DBA to do this you can use the ‘Prepare
Scripts’ option instead.

I’m creating the
Repository now, so next the database connection details are required, including
a user with DBA privilege:

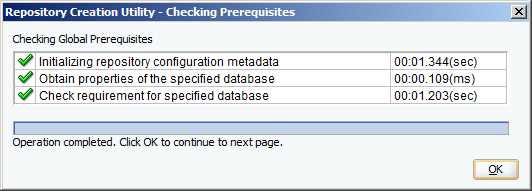
The RCU will check the
details entered:
You now need to select
the components to create the repository for.
‘AS Common Schemas’ are compulsory and already selected. All we need to
do is select ‘Oracle Data Integrator’ – ‘Master and Work Repository’ will be
auto-selected.
You can also choose a
prefix for the schema owner. It defaults to DEV, which is fine for me. Make a
note of the schema owner – DEV_ODI_REPO in this case, you will need it later.

Some more checks are
carried out:

You now need to enter a password for the
schema owner – this is only one schema, so select ‘Use same passwords for all
schemas’ and enter your password twice. Again you will need this later.

Now some additional
details are required for the ODI repositories:
• Supervisor password (SUPERVISOR is
the admin user in ODI)
• Work Repository Type – I chose
Development - D - (which allows
execution as well)
• The Work Repository Name
• The Work Repository Password
Make a note of the
details you enter, you will need them later.

At this point (if the
database is Oracle) you can choose which tablespaces create the repositories
in. The RCU will fill in default values and I had no reason to change them. If
you are installing the repositories in a server database the DBA’s may have
preferences they wish you to use. Click on the ‘Manage Tablespaces’ button if
you need to do this.

You will get a warning that the tablespaces
don’t exist and will be created if you continue:

Let the tablespaces be
created:

Finally the RCU is
ready to build the repositories. Click Create to start:

This will take a few
minutes and all being well you will get a successful completion screen:

Click ‘Close’ to shut
down the RCU.
Create the Domain for the Standalone Agent
As this is a
standalone installation we now need to setup the Agent process. The weblogic
node manager will be used for this and a couple of command files will be
created which need to be run to start up the agent whenever you want to use it
– to replace the none existent weblogic server.
Later on I’ll show how this can be simply automated in a windows
environment.
The first step though
is to run the agent configuration wizard. This is located in the
<AGENT_HOME> directory.
Go to the <AGENT_HOME>\oracle_command\common\bin
directory and run config.cmd.
The Wizard will load and start you off in the
configuration type screen.
Ensure ‘Create a new
domain’ is selected and check the domain location – this can be left as the
default <AGENT_HOME>\user_projects\domains\base_domain or changed as
required – I’ve given mine a slightly more useful name:

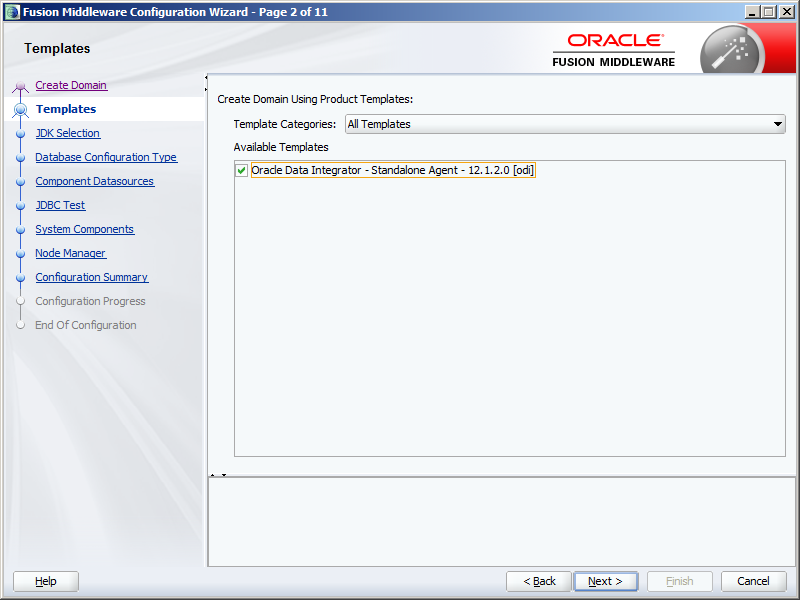
In the templates
screen you have to select the template for the Agent. There is only one – ‘Oracle
Data Integrator – Standalone Agent – 12.1.2.0 [odi]’, so select it:
Next you need to specify
the Java JDK to use. If you set the JAVA_HOME environment variable it should
default to this, otherwise you will need to enter it. Be warned, in a windows environment use the
short directory name PROGRA~1 rather than ‘Program Files’ to remove the space:

The wizard now need to
retrieve the repository configuration from the database. Enter the connection
details for the database as created using the RCU above. If you changed the
schema owner prefix change the DEV_STB schema name appropriately.
Then click ‘Get RCU Configuration’ and wait for
the details to be retrieved in the ‘Connection Result Log’ window. If you get
any errors check your connection details and try again.

In the next screen you
need to confirm the details are correct. As we created the schemas with the
same password, the passwords will default to that entered in the previous screen.
If the schemas have different passwords you will need to enter them here.

The wizard will then
test the connection to these schemas and show the results of the test. Again if
you encountered any errors go back, check the details and passwords and try
again:

The System Components
screen is where we specify the agent to be created. This will be populated as
below by default and you shouldn’t need to change these values. Make a note of
the System Component name – OracleDIAgent1 – this will be needed later.

You must now specify
the details for the Agent. Again this will be default populated – you only need
to enter the SUPERVISOR password – which you created during the RCU install
above. Make a note of the Server Listen Port number, you will need this later.

In the Node Manager
screen choose ‘per domain’. The ‘Custom Location’ would be used in a server
environment where a number of users share an Agent.
You need to create credentials
for this Node Manager - which will be needed for when starting the Agent. Enter
a suitable user-id and password – and take a note of them.

Finally confirm the
configuration is correct before clicking ‘Create’:

This configuration
will only take a few seconds:

Finally take a note of
the domain location (which is what you entered above):

Start the Agent
To start the Agent two
processes need to be kicked off:
·
- The Node Manager
- The Agent Process
To start the node
manager, from the agent domain home run startNodeManager.cmd:
<AGENT_HOME>\user_projects\domains\agent_domain\bin\startNodeManager.cmd

Minimise the command
window that opens (do not close as this will shut down the node manager)
To start the agent,
from the agent domain home run startComponent.cmd
OracleDIAgent1
Do it from a command
window:
<AGENT_HOME>\user_projects\domains\agent_domain\bin\startComponent.cmd
OracleDIAgent1
you will be prompted
to enter the node manager password.

In this case the start
process returns back to the command prompt, so you can close the window. If you
look at the Node Manager command window you’ll see it now reports than
OracleDIAgent1 is now running:

You can confirm this
by entering the Agent URL into a brower. The URL will be:
and will return a
<Ping/> tag if working correctly:

Scripting the startup of the Node Manager and
Agent
You need to start the
Node Manager and Agent everytime you need to use them. Not a problem on a
server as you can just leave them running, but off-line, such as on my laptop,
you’ll probably shut the computer down regularly and therefore need to start the
Node Manager and Agent regularly.
It’s a simple task to
script the running of these via some basic Windows batch functions.
Firstly we need to
automate the entering of the Node Manager password. In the <AGENT_HOME>\user_projects\domains\agent_domain\bin
directory create a text file called properties.txt and into it enter the
password for the Node Manager:

Now in the
<AGENT_HOME> directory (or anywhere else that’s easy to locate) create a
file called start_agent.bat. Edit it and
enter the following commands:
ping
-n 20 localhost > nul
cd
C:\app\Agent12c\user_projects\domains\agent_domain\bin
start
/min startNodeManager.cmd
ping
-n 20 localhost > nul
cd C:\app\Agent12c\user_projects\domains\agent_domain\bin
call
startComponent.cmd OracleDIAgent1 <properties.txt
exit
|
This calls the
startNodeManager.cmd with the /min parameter so the command window is
automatically minimised.
For startComponent.cmd
the properties.txt file is used as an input file – this means that when
startComponent.cmd pauses to wait for user input that input will be taken from
the file, so the password will be entered automatically. Not recommended for a production environment,
or even an enterprise development environment, but perfect for an off-line
standalone environment!
In between the
startNodeManager.cmd and startComponent.cmd is a ping command. This just pauses
the batch file giving the node manager time to start up before the agent is
run.
In the next step I’m
going to have this batch file run automatically when my laptop starts. This is
what the first ping command is for. It pause the running of the batch file to
allow for other Windows services to start – if you have many other services on
your computer, or it’s just a slow computer you may want to lengthen this delay
by increasing the ‘–n 20’ option to a higher number.
Finally the ‘exit’
command closes the command window once the agent has started.
To have this batch
file run automatically upon windows start-up simply copy it (or a shortcut of
it) to your start-up folder. From the
start button select ‘All Programs’, then right click on Startup and select open
and paste it into the explorer window, or go straight to the startup folder
under C:\Users\user-id\AppData\Roaming\Microsoft\Windows\Start
Menu\Programs\Startup.

Now restart your
computer. Once it has fully restarted you’ll have one minimised command window
for the Node Manager, which if you look at should say ‘OracleDIAgent1’ is now
running:

Running ODI Studio for the first time
The first time ODI is
run a connection to the Master repository needs to be created, followed by the connection
to the Agent.
The ODI installation
does not automatically create a program group or any shortcuts – you can do
this yourself if you want.
ODI Studio can be
found in the <ODI_HOME>\odi\studio directory. Choose odi.exe for 32bit Windows or odi64.exe
for 64bit. (or odi.sh for Linux)

Upon first running Studio you will be prompted for the location of the Java JDK. This should default to the Java in your JAVA_HOME – although interestingly it’s happy about the space in ‘Program Files’ this time. If not JDK is specified, click Browse to locate it.

Then the funky splash
screen appears…

As this is a
first-time run, it asks about importing preferences. I didn’t have previous
installation to import from…

And then we are in ODI
studio!

So the first job is to
connect to the master repository.
From the menu bar,
select File -> New
In the ‘New Gallery’
window, click on the ODI category then ‘Create
a new ODI Repository Login’ before clicking Ok.

Then enter the
connection details to the Repository – the supervisor user/password as entered
when creating the domain (note the user SUPERVISOR, must be entered in uppercase)
and the DEV_ODI_REPO being one of the schemas created by the RCU above (change
the prefix DEV if required)
Note the Login Name
for supervisor is just a text name referring to the supervisor user-id, it’s
not the user-id itself which is on the next line. You could enter any text into
this field.
It’s also worth
selecting the Work Repository to connect to at this point as well – otherwise
you’ll only have to manually select it each time you connect. Use the
Magnifying glass icon next to the Work Repository field for this. This is also
a good test of the connection details already entered – it will error if the
user-id or password for Supervisor is wrong.

Click test just to
make sure!

ODI uses a wallet to
store encrypted connection details – using this means you only need to enter
the wallet password each time you connect rather than individual passwords for
the master & work repositories and other components. So enter a password
for the wallet. The 18,000 days I entered for expiry is probably a little OTT,
but this is only a dev emvironment! You can store
the passwords without a secure wallet, but I can’t think of a benefit in doing
so unless you intend to forget your password or are particularly lazy…even in a
development environment you should have some security on your work.

Now back at the main
ODI screen, click Connect to Repository....which we’ll be doing every time we
launch ODI. Enter the new Wallet password:

Then in the ODI login
screen the user/password details are pre-filled out for us, so just click OK to
connect.

Connect to the Agent
Now that you are
connected to the repository we can configure the Agent connection.
Click on the Topology
tab of the navigator window then right click on Agents and select New Agent:

In the new tab that
opens up enter the Agent Name (the system component name when installing the
Agent above), e.g. OracleDIAgent1,the name of the host server and the port on
which the Agent listens – specified above when installing the Agent:

All other values can
be left as default. Click the Test button in the menu bar of the tab.

Then click Apply
Settings to save and close the Agent details tab.
So that’s it, ODI is
now fully installed and ready to use.
Enjoy!